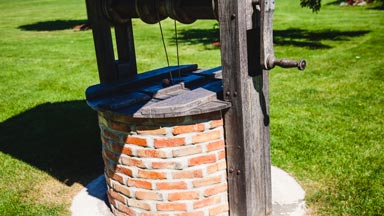
How to Chlorinate Your Well | Well Water Testing

Chlorinating your well is imperative to removing and maintaining an absence of bacteria in your water, especially coliform bacteria.
Coliform bacteria can be the catalyst for disease causing bacteria, viruses and other parasites. Keeping your water well clean will help to reduce bacteria and protect your family, pets, cattle and crops from sickness and disease.
Before you chlorinate your well, there are a number of precautions and steps to take to ensure safety for your family. Keep in mind that doing laundry and taking a shower cannot be done for at least 24 hours with a chlorinated well. Waiting a few days to do these is a good idea. We recommend using unscented bleach for this process and using a from your local supply store.
The Chlorination Process
- Open your well cover and pour bleach in making sure to saturate the wells inner walls.
- Run a hose from your outside faucet into the well and let the water spray at full power.
- Continue the spraying process until chlorine is detected from the hose. Once chlorine is present, spray the inner walls thoroughly and shut the hose off.
- Replace the cover on the well. Keep in mind that a shallow well will usually circulate within a half hour while a deeper well can take significantly longer (a few hours sometimes).
- If your home uses an electric water heater, you must run hot water through your faucets to replace the un-chlorinated water with chlorinated. You must run all of your faucets, tubs, laundry, dishwashers, etc., to remove the un-chlorinated water from these systems. * (Make sure you run your laundry without clothes).
Once you have completed all of these steps in chlorinating your well, make sure everyone in the household is aware that this process was done. For 24-48 hours, the only water used throughout the house should be the flushing of your toilets.
Discharging the Chlorine
One day after chlorinating your well, run the hose outside to an inconspicuous area. An hour on and an hour off is a good rule of thumb for pumping a low production well. Keep an eye on the chlorine level and it will gradually decrease as fresh water makes its way into the well and dilutes the chlorinated water. Keep up this process until all of the chlorine is absent from your well. This process can take 2-3 days. Repeat step #6 to continue replacing the treated water with fresh water throughout the house. You may need to install a new cartridge into the filter or switch the softener to service mode, if applicable. It is recommended to test the water for bacteria before consumption and a follow-up test should be made as well to make sure the problem doesn’t come back.
Loss of Pressure
If after your well has been chlorinated and there is still low pressure, it is important to check and see if the following pertain:
- Sediment filter in basement may be clogged.
- Screens on all faucets may be clogged.
If your water pressure gauge is below 20 psi, shut off the hose and let it sit for a half hour. If the pressure does not come back, contact a water treatment specialist.
Located in Coopersville, MI, Alliance Analytical Laboratories is a well water testing lab with national and international capabilities. Contact us today to learn how to chlorinate your well and to request a quote or call us directly at (616) 837-7670.

 Microbiology